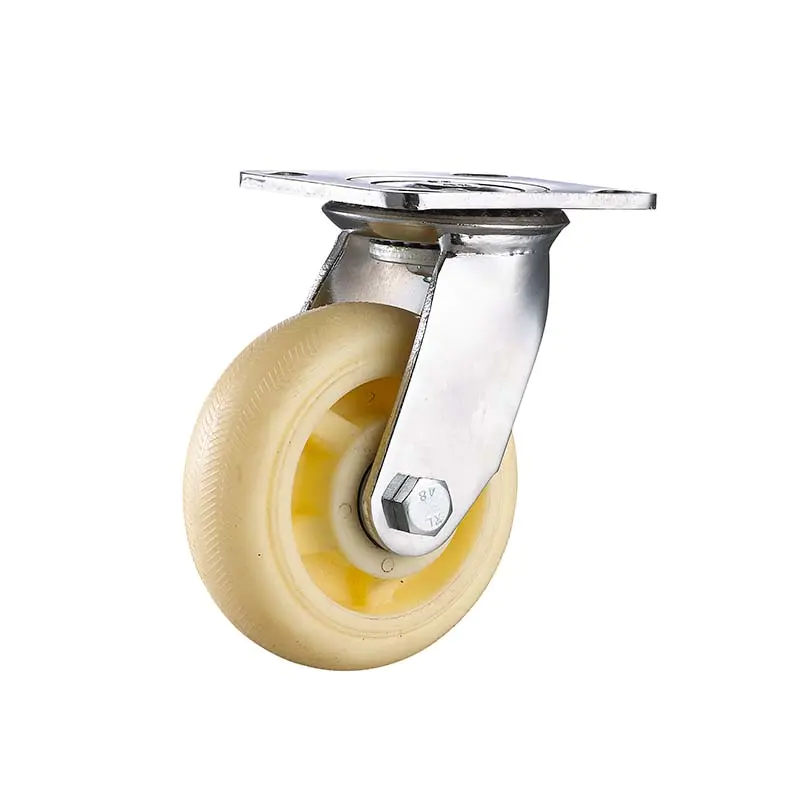
Medium heavy duty PU caster wheel for Roll container warehouse Logistic cargo cart
Medium-heavy duty caster
bike trailer -- tough and light
by:Dajin caster
2020-06-16
Instructions on how to make tough and light bike trailers with hardware store\'s standard lamp gauge horn iron.
This design is tough, light, easy to build and easy to customize.
The tools required for this work include--
Hammerchiselack sawAdjustable wrench (two)
The ratchet belt 5/16 sockpuppet sdrill belt has a circular saw with a cross bitTape measure sharpiecointegration squareIf, which is probably easier than with a hammer and a chisel.
In the end, I got tired of using hacksaw and borrowed a friend\'s angle grinder with a cutting disc.
These photos are just to show you how the material looks.
Here is a more or less thorough list of materials.
The price could be $100, but it\'s worth about $300 as a cargo trailer for a bike shop.
6 each catheter band, two-
Hole type, size 1/2, about 19 linear feet angle stock (
Found in the hardware store or the local big box store)
4 washers, 1/2 inner diameter 38 washers, 5/16 inner diameter 8 wood screws, 1 inch long 8 bumper washers for 24 bolts for wood ironing boards, 5/16 diameter, 3/4 long 5/16 1/1 diameter 5/1624/2 long, Hexagon head 24 nut, 16mm washer, split ring, suitable for 5/1/2 bolts3 foot 20 inch threaded rod2 diameter per wheel, plastic spokes3 full term month nominal lumber2 feet monthly month nominal lumber6 nylon gasket, 1/2 inner diameter, about 1/2 deep 12-foot rope, Machine Screw about 1/4 diameter 4, No.
10 diameter 1/1/2 long, phillips head 4 nut, no.
10, with nylon lock insert 1 castors with removable wheels and ball bearings 1 1/4 pin bolts at the bottom, used as a quick release between the tongue and the receiver. The base chassis frame consists of a 2 feet x 3 feet angle iron rectangle with two 2 feet-long parts reinforced in the middle.
Cut 2 pieces per 3 feet pieces and 4 pieces per 2 feet pieces of angle iron.
Bolt together using 5/16 hex bolts with 1 split ring and 1 cut washer.
The frame will have some weaknesses when it is twisted, but we will make it harder in the next steps.
In a huge step, the axle, axle stand and strap are attached to the chassis frame.
Cut 1x3 into a size of about 26 inch long, in the middle of the chassis frame.
There should be about 1 inch prominence on each side.
Fix 1x3 bolts on the frame with 1/2 hex bolts 5/16 long.
Since this is a key connection, I used a cutting washer and a nut with a nylon plug-in.
You have to reverse the hex head so it doesn\'t interfere with the axle.
Before connecting the axle, first rotate a 1/2 nut on the screw bar and then rotate two nylon washers (bushings).
As shown, rotate the other two nuts onto the screw bar and place them next to the duct belt. Pre-
Drill through wood and angle iron and tie the pipe belt to the chassis frame.
Cut 2x6 nominal wood into 24 inch long.
The part should be installed directly between the two intermediate angle brackets on 1x3.
Gap the ends of 2x6 out to accommodate bolts that fix the axle assembly.
You can cut the wood off with a hammer and chisel until it is appropriate, basically trial and error.
I used a saw.
Cut the end and type out the loose part.
Fix 2x6 in place using wood screws and bumper washers.
Four screws are used on each side, two at each end and two at the bottom.
Be careful here, I split the first 2x6 so I recommend pre-
Drilling, not getting it down often.
After 2x6 is fixed, the frame becomes more rigid without any twisting action.
2x6 also supports the cargo and resist axle bending under heavy loads.
Cut the length of the horn to 31 inch long.
At about 19 inch down, cut a vee cut to bend the work piece about 40 to 45 degrees.
The short end of this piece becomes the connection of the reading shaft on your bike, so you need to check the length of the bike wheel first.
The size here may be good for most mountain bikes as that\'s why I\'m dragging the trailer.
Once you are satisfied with the length and bending angle, cut two pieces of angle iron to reinforce the tongue.
About 10 1/2 below, about 12 inch above.
Tie these on the tongue to form part C.
Cut two more pieces of angle iron, each piece is 7 1/2 long.
Use these bolts to strengthen the bending of the tongue.
Design a clip to strengthen the connection between the tongue and the chassis frame.
It is made of three pieces, two pieces 1/4 long, and one piece 1/2 long.
They bolt together with one bolt and then secure it on the tongue and frame.
In the early model of this trailer, the weakest part is the tongue, which is bent too much during the ride, so that it is permanently bent and twisted, causing the trailer to bend.
So, if there seems to be a lot of reinforcement on the tongue, there is a good reason.
Remove the rubber wheel from the casters.
Cut a horn about 4 inch long.
Grind or cut an edge so that it is not more than 3/4.
The corners of the short legs should also be ground or cut.
Connect the caster bolt to the angle iron so you can string the angle iron with the hub and tighten it.
Cut two pieces of angle iron to 1/2.
Chop or grind one edge of each piece so that the left side of the leg is no more than 3/4.
Sew the two pieces together and insert them to the end of the tongue.
Plug the cutting washer between the tongue and the hook so that the hook is mounted inside the caster receiver, but it doesn\'t matter because there is a small action here that is fine.
This should require about 14 cutting washers in total, but it depends on the side of your casters and washers.
Wheel mounting is easy, just follow the order in the photo.
You can put some thread locks on the nuts outside, but with the tail cap it may not work on its own, especially if you tighten it to another nut.
Before installing the end cap, cut the end of the screw bar and leave an extension of about 1/2 outside the external nut.
The hat will cover this.
Do not tighten the nut onto the gasket as it will combine the bearings together and the wheels will not rotate smoothly.
Instead, let it snuggle with each other and tighten the bolts.
Use a 1/4 nylon rope to pass the rope through the chassis frame to form a net that holds the goods.
This can be achieved with any creative pattern, which shows the basic chain link pattern.
This is how the trailer looks.
I can transport at least 100 pounds of the goods on this, no problem.
It\'s only 20 pounds, which is also quite light weight for its grade.
You can really pull the strips with reflector, good paint and gorgeous rope mesh.
Custom message
Related Products