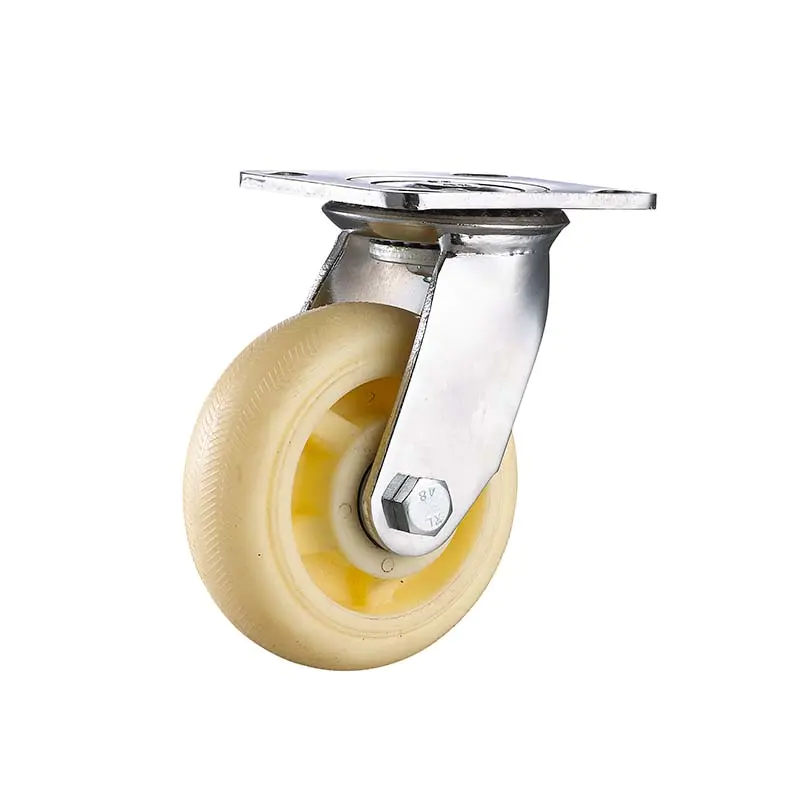
Medium heavy duty PU caster wheel for Roll container warehouse Logistic cargo cart
Medium-heavy duty caster
building a strong flexible bicycle trailer coupler.
by:Dajin caster
2020-06-12
This instructions will show how to build a coupler that can be used with a variety of bike trailers that will be turned and rotated in all possible directions: up and down, side by side, and rotate to allow the trailer to \"tilt\" from one side to the other during the trip \".
I \'ve seen a previous instruction manual that relies on a swivel caster that allows the bike trailer to move up and down vertically from one side to the other, but a \"tube and sleeve\" coupler that allows the trailer to rotate was later suggested (tilt).
While the proposed instructions will work as suggested, it seems to me that with the investment of the second Rotary caster to be installed on a fixed frame with the 90 degree angle of the first rotary caster, you can easily get flexibility in all 3 motion planes :(1)
Lateral steering is allowed; (2)
Allows the trailer tongue to move up and down vertically; and (3)
Allows the trailer to \"rotate \"-
\"Prompt\" from one side to the other \".
The proposed plan allows such a movement to be carried out :(1)
A caster is trimmed flush on one side to allow it to be bolted horizontally to a point on the bike, and then the caster frame is connected again to the wheel, allowing the caster to rotate horizontally at the bike mounting point; (2)
The caster rotation on the first Caster also allows the trailer tongue to move up and down vertically; and (3)
The caster rotation on the second caster allows the trailer tongue to \"rotate/tip\" from one side to the other during driving, which is not related to the vertical angle of the bike.
The part needed for this plan is simple:1)
Two swivel casters of sufficient size
I used 2 \"swivel casters provided by local hardware or home improvement shops for about $4 each. (2)
Frame connecting these casters to each other at right angles.
I purchased a heavy duty right angle galvanized structural connector (i. e. , Simpson)
Available from a local lumber factory or building supply store for less than $4. (3)
Enough short bolts and locking nuts to attach the casters to this frame.
I used 8 1/2 \"long 1/4\" bolts and nylon-
Insert the lock nut and connect the casters to the galvanized structural connector bolts. (4)
Connect the hook to the appropriate hardware on the bike and trailer frame.
I made an extension stand on the bike (see step 2)
This is shown as a red square pipe in the picture indicating this step.
The trailer tongue is the black part of the square pipe and is also shown in the same picture.
I used the casters described in the following steps to connect the trailer car hook to the mounting point on the bike and the bike trailer. (5)
While purely optional, I would like to be able to quickly connect and separate the bike trailer from the bike;
Therefore, one of the two caster bolts is replaced with a locking connection pin of similar diameter and length, which slides through the caster bolt hole and the caster bushing (
See attached photo on the right side of the ring at the top of the lock connection pin inserted through the casters).
This is also a hardware store, which should cost less than $4.
Although many bike trailers are connected to the rear left wheel hub of the bike, this connection point prohibits the trailer from turning 180 degrees at the back of the bike.
I have a long wheelbase horizontal bike that is already hard to turn in a narrow radius
I don\'t want a trailer hook that is not completely flexible, and I don\'t allow my bike trailer to turn freely behind the bike.
In order to move the pivot point between the bike and the trailer to the point that allows the trailer to turn from one side to the other as much as possible, I attached the 3/4 \"X 3/4\" long square Channel steel pipe to the back of the main sprocket of the bike, and used several roller coaster brake frame clips to firmly clamp on the left rear falling off left chain ring (hub)
And then drop out of school after extending past the bike rear tires.
I painted this tube in the same color as the bike and it stayed on the bike all the time.
At the end of this added pipe, before installation, I drilled one of the two casters and connected it.
This caster wheel is cut flat on one side with Dremel tool cutting wheel to facilitate it to connect to the tubing and drill vertically to allow it to connect to the tubing Bolt.
Then attach the caster frame to the casters and turn around the casters (
In the way of the original design)
And allows the trailer to rotate left and right freely.
The rotating attachment itself is very simple.
It consists of two 2 \"swivel casters, fixed to the outer surface of the right-angle Simpson structural connector with a bolt and a locking nut of 1/4 in half an inch.
You have to drill holes in the proper position of the right angle connector to match the holes in the corner of the caster.
Now you need to connect the hook to the trailer.
Here you have to be \"innovative\" and consider the design and geometry of the trailer tongue.
My trailer, built with a push frame-
Pull a golf cart with a square tube of 3/4 \"X 3/4 (
Similar to the connection point I made for the bike).
I need the rotation capability of the second coupler so that the trailer can open its \"third plane \"--
Able to rotate (tip)
From one side to the other
But I decided I didn\'t want the trailer to be able to turn from left to right from the second joint of the hook.
So when I connected the second caster to the handle of my bike trailer, I used the wheel frame of the caster to cross the tongue of my bike trailer and cut the casters with the Dremel tool cut-off wheel, to fill the gap between the width of the trailer tongue and the bolt holes in the caster frame.
Although I filled the gap tightly with the cut casters, and it could be \"rubbing fit\" enough, I didn\'t want to risk getting the wheels off the trailer tongue, so I also drilled the second caster and tied it to the trailer tongue (
You can see the bolt holes in some pictures of the caster wheels-
I drilled a hole in the wheel of the bolt diameter, but then used a larger bit to put the bolt head counter into the wheel).
Of course, depending on the design of the bike trailer, the appearance of the trailer attached to the bike will vary.
The first two pictures describe the frame of my bike trailer attached to the connection point of my flat bike, using the simple and very sturdy bike trailer connector explained in this manual.
On that frame, I added a large plastic tub with a latch to block what I was carrying on the bike trailer.
To connect the plastic tub to the frame, I used two short 1 \"x3\" size wood that was mounted perpendicular to the trailer frame at the bottom of the plastic tub, fix the board in proper position with liquid nail glue, use short wooden screws through the bottom of the plastic tub, and then connect the plastic tub to the frame using a 3/4 pipe clip, pipe clamp through those short wood, plastic bath bottom and \"ear\" conduit clamp using 1/4 \"X 1 1/4\" transport bolts and nylon
Insert the lock nut.
I used two short boards and two pipe clips at the bottom of the plastic bucket, creating two connection points for the plastic bucket.
I also reinforced the lid of the plastic tub with a piece of 1 \"x 3\" size wood that spans the top under the lid of the plastic tub.
I glued the board to the end with liquid nails and short wooden screws at each end, but also used 4 small screws, passing through the side wall of the plastic bathtub and entering the end of the board.
If I tie the item to the lid of the trailer, these eye screws will provide anchor points for the bungee cord, and an additional 1 \"x3\" plate is immediately attached to the lid of the trailer.
Custom message
Related Products